


![]()
Forks
![]()
Assembly
When assembling the forks, you can ensure everything in square by passing the
axle through the forks and supporting the top end of the forks as the cement dries.
![]()
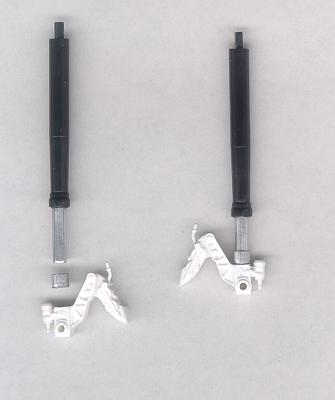 Rebuilding
February 14, 2001
Its easy to rebuild the forks to have real metal for the telescopic portion.
Rather than using a metallic paint to try and get the proper effect. The
telescopic portion can replaced with steel or polished aluminium tubing. If
using
aluminium tubing, it can be polished to a chrome like finish using a finger nail
buffing stick. I use 5-minute epoxy to assemble the forks.
A jig of various tubing was used to keep the aluminium tubing aligned while the 5 minute epoxy dried. This ensured that the tubing's centerline matched the upper fork's centerline. I placed the fork inside some tubing and some smaller tubing around the new aluminium lower end.

|
|||||||||||||||
 Home - News - Tips - Gallery - Workshop - Kits - Links - What's New? - Site Index |